

Freedom Planet 100% Completion Guide (PC/Wii U/PS4/Switch)
Beginning of the End:
So, you’ve recently bought Freedom Planet? And the achievements interested you? Look no further, this guide shall give you all information you need to get all of them. The majority of completion needed for this game comes down to the achievements, which are available in any and all versions of Freedom Planet.
Lilac Achievements:

Dragon Power
Clear all Lilac stages
Target Master (Lilac)
Clear all target rooms in Shang Mu Academy as Lilac
Rising Slash Finish
Defeat an end boss with Lilac’s Rising Slash
Dragon Cyclone Finish
Defeat an end boss with Lilac’s Dragon Cyclone
Dragon Boost Finish
Defeat an end boss with Lilac’s Dragon Boost
Lilac the Switch Skipper
Skip the switch door in Dragon Valley as Lilac
Boost Perfectionist
Destroy a Chopper with a single Dragon Boost as Lilac
Ledge Taunt
Rest on the ledge during Lilac’s fight with Spade
Freefaller
Clear Sky Battalion without using Torque’s plane
Carol Achievements:
Call of the Wildcat
Clear all Carol stages
Target Master (Carol)
Clear all target rooms in Shang Mu Academy as Carol
Wild Claw Finish
Defeat an end boss with Carol’s Wild Claw
Wild Kick Finish
Defeat an end boss with Carol’s Wild Kick
Motorcycle Finish
Defeat an end boss while riding Carol’s motorcycle
Milla Achievements:

Spirit of the Hound
Clear all Milla stages
Treasure Hunter
Dig into a treasure spot as Milla
Target Master (Milla)
Clear all target rooms in Shang Mu Academy as Milla
Phantom Block Finish
Defeat an end boss with Milla’s phantom blocks
Super Shield Burst Finish
Defeat an end boss with Milla’s Super Shield Burst
Card Achievements:
Card Collector (Dragon Valley)
Collect all 10 cards in Dragon Valley
1. After the first side ramp near the beginning of the level, jump over to the platform with a spring on it and that’ll lead out towards the card.
2. Underneath first side ramp, head left and drop down a hole.
3. Once you reach the spring that takes you to the hanging bars on the ceiling, make your way up ladders to the top-most platform.
4. After crossing a bunch of platforms you will find a ladder leading up to the next card.
5. Up by the push block in the second area.
6. When you ride down the wall to the water at the beginning, go left and break through the rock wall above.
7. At the bridge area, push the log away from the hole and jump down the hole. Go left and you’ll find the card underwater.
8. Close to the top between the two waterfalls, just before the snake boss starts attacking you.
9. Soon after the waterfall area you’ll find this card against the wall to the right.
10. The 10th card is in the underwater pathway to the left of the waterfalls.
Card Collector (Relic Maze)
Collect all 10 cards in Relic Maze
1. Ride the bar at the beginning of the stage and the card will be at the top.
2. In a location not far from the first card, ride the large platform that swoops down and you’ll see it.
3. Once you see the spikeball and fireball traps head straight upwards. The card will be at the top.
4. At the end by the button that destroys the yellow barrier.
5. At the top of the first loop-de-loop.
6. Look up after you get past the last few rotating barriers and it’ll be in the corner.
7. When you head down the Lift, head left and Dragon Boost up the hole.
8. Once a large spike ball breaks out of the wall beneath you and go into the hole it came from.
9. In the area with the giant falling drills, stay at the top and it’ll be just after you go by the drills.
10. In the corner of the Mantalith boss arena.
Card Collector (Aqua Tunnel)
Collect all 10 cards in Aqua Tunnel
1. Underwater, to the left of the first few platforms that spin around downwards.
2. Once you reach the door in the ground that opens with the button next to it, jump into the wall to the right first instead.
3. Go up first before dropping into the water jet at the beginning of the level.
4. Continue swimming in the water and make your way up to the grassy place. Once you’re up there, go left until it drops off & just fly for a bit.
5. At the beginning of section 2 of the stage, you can see this one under a green pipe. Keep going forward so you can get underwater, then you can swim back to it.
6. Below Card 24 in the underwater tunnel.
7. In the vertical part of section 2 you can reach this card by flying through the ceiling.
8. When you reach section 2’s third area, go down into the water as soon as you can and you will find a passage leading to the 8th card.
9. Once you find two lakes of green slime, go across the bottom first so you can spring up to reach this card.
10. This one is just before the end boss of the level.
Card Collector (Fortune Night)
Collect all 10 cards in Fortune Night
1. Towards the top at the beginning, go across the curling bridge and loop around the red and green ramp to find the card.
2. On a balcony before you reach the yellow shield-car. It is at the point after you pass Serpentine’s spaceship for the first time and make sure you stay on the bottom level.
3. Before continuing to the next area, hop on the first red roof when you see the Zao-faced lanterns in the air.
4. Begin at the end of the Yellow Springs on each side. Keep walking to the right until you see a ladder, drop down from there and go left past the moving blocks. Continue down the next ladder and hop on the train.
5. At the beginning of section 1’s second area where the trains begin to appear, jump onto the Spring and head up to the top of the red roof.
6. After your next encounter with Serpentine’s spaceship, head up the road. Once you’re up, head through the middle section and go down the red/green snake. Continue until you see a Zao Statue. Jump on the Ferris Wheel to find this card.
7. Keep to the bottom and the card will be underneath an escalator in a tube.
8. Head up the escalators until you see some spikes and a swing, however don’t use it. Instead, keep moving right and jump onto the middle grassy platform and continue over the springs. Jump again onto the next middle platform. The card is a few steps away after that.
9. In section 2’s second area, head to the bottom and go underneath a long rising platform. This card will be in the pathway below.
10. When you reach the elevator, drop down all the way to the bottom of the stage and the card will be on your left.
Card Collector (Sky Battalion)
Collect all 10 cards in Sky Battalion
1. Once at Metal Ship, boost upwards at the green balloon and get to the lone floating missile.
2. Not long after the first card, head downwards and then left.
3. When the gold-trimmed floor starts to become wood, boost up to the top right.
4. While on the Fire Ship, just before you get on Torque’s plane, go up to the top of the ship’s front bow and the card will be there.
5. After landing on the start of the ship, head to the top right and boost to reach the orange gate.
6. After the loop-de-loop with fire-emitting engines, head up to the top left.
7. On the Fire Ship just before the fight with Spade, go to the left of the spiked fan.
8. To the right of the moving crystals, Dragon Boost into the spikes on the top right wall so that you can reach the area at the top left.
9. While on the Earth Ship, use the large wind current to get yourself to the floating missiles
with the use of Lilac’s Dragon Cyclone move.
10. At the part with the falling platforms and crystals, make your way across them with out falling down to the bottom.
Card Collector (Jade Creek)
Collect all 10 cards in Jade Creek
1. Get your way back up again after the second card.
2. Drop down into the water after the first card.
3. Stay up the top of the Level.
4. Soon after a collapsing platform, jump off of it before it reaches the bottom and go left as you’re doing this.
5. Take the spring in the water to give you the speed needed to reach this card. It will be on your left.
6. Drop down into the water as soon as you can.
7. Ride the clovers at the beginning, and the clover on the left right next to the wall should take you to this card.
8. Swim around the submarine’s water filled area until you find an orange tower.
9. Go underwater to the gray bottom of the submarine and there’ll be a card.
10. On of one of the towers.
Card Collector (Thermal Base)
Collect all 10 cards in Thermal Base
1. At the beginning of the moving engine platforms, Dragon Boost upwards to reach a ladder you can climb.
2. When you get to the room that’s filled with wooden boxes, it’ll be behind the second row of boxes.
3. To the right of the first locked door, go under the platforms that constantly move up and down.
4. Close to the 3rd card, boost up to the top of the pathway.
5. Boost upwards after getting the Key Card from the above narrow passageway.
6. Below the metal pipes, go to the area at the left nearby the jump pads.
7. Its on one of one of the conveyor belts with gems nearby it, towards the top and ceiling of the stage.
8. After getting out of the water, get yourself up over to the left-most platform.
9. Jump off of the circular metal sphere to the left and ride the engine platform.
10. Before grabbing the second Lever to fill the area up with Water, go down into the drains and pass a few spikes to get the Key Card needed to reach this card.
Card Collector (Trap Hideout)
Collect all 10 cards in Trap Hideout
1. Get up above the ground block in the air near the start of the level.
2. A floating pillar in between hill-like tires.
3. Below one of the large ropes, in a corner with chests.
4. Close to some wooden boxes and explosive spheres.
5. On three pillars made up of tires.
6. Once you’re in the second area, climb up to the logs that hold some sphere bombs.
7. Just before the area with the large amount of springs.
8. After getting onto the barrel in the second area and breaking the floor.
9. On a collapsing platform at the start of the 2nd section.
10. In the tower climbing section, on a line of spikes.
Card Collector (Pangu Lagoon)
Collect all 10 cards in Pangu Lagoon
1. On a floating crystal platform that moves up and down.
2. When the path forks into up and down, take the downwards path and follow it to the end.
3. After the first towers that you boost your way up, head downward to the area with many crystals.
4. Use the boost increasing ring to reach the platform with a single chest.
5. After breaking through the first wall with the giant bow.
6. Go left after going down the first slope.
7. Use the spinning top to reach the floating platform to the right.
8. Quickly go over the vanishing blocks.
9. Keep going right, and find your way to the top to find this card.
10. Boost up to above the giant swords in a narrow corridor.
Card Collector (Battle Glacier)
Collect all 10 cards in Battle Glacier
1. After the rising platforms, go to the top right.
2. When the robot worms start to dig out the ground.
3. On a platform that is created via some appearing purple blocks.
4. Use the moving hanging bars to get upwards to the point where the card is visible.
5. Boost up past the metal walls and break the ones at the top left.
6. Skip the first twirling slide and boost up to the next one.
7. After beating the cycloptic robot mini-boss, the purple dragon blocks will turn into gems and you’ll be able to collect the card.
8. Dragon boost upwards past the blocks that can be blown up to reach the crane that lets you get to the star card.
9. Take the upper path way when you encounter the green and red blocks.
10. After the green and red block maze, use the levitation machines to float to an alternate route and then blow up the metal walls with the drill missiles.
Speedrun Achievements:
Speedrunner Clear
Clear the game in less than 90 minutes
Dragon Valley Speedrunner
Clear Dragon Valley in 5 minutes
Relic Maze Speedrunner
Clear Relic Maze in 8 minutes
Aqua Tunnel Speedrunner
Clear Aqua Tunnel in 5 minutes
Fortune Night Speedrunner
Clear Fortune Night in 8 minutes
Sky Battalion Speedrunner
Clear Sky Battalion in 7 minutes
Jade Creek Speedrunner
Clear Jade Creek in 8 minutes
Thermal Base Speedrunner
Clear Thermal Base in 9 minutes
Trap Hideout Speedrunner
Clear Trap Hideout in 6 minutes
Pangu Lagoon Speedrunner
Clear Pangu Lagoon in 8 minutes
Battle Glacier Speedrunner
Clear Battle Glacier in 12 minutes
Final Dreadnought 1 Speedrunner
Clear Final Dreadnought 1 in 5 minutes
Final Dreadnought 2 Speedrunner
Clear Final Dreadnought 2 in 9 minutes
Final Dreadnought 3 Speedrunner
Clear Final Dreadnought 3 in 6 minutes
Final Dreadnought 4 Speedrunner
Clear Final Dreadnought 4 in 8 minutes
Miscellaneous Achievements:
Gem Hoarder
Clear the game with over 6000 crystal shards
No Death Clear
Clear the game without losing any lives
Claw Bypass
Skip the Claw boss in Relic Maze
Disco Fever
Bust some dance moves in Fortune Night
CPU Finish
Let one of your teammates finish off Robopanther
Rolling Stones
Get a boulder to wrap around the screen
Push Block KO
Destroy the Eye Golem in Relic Maze with a push block
All Bone, No Brain
Trick the Bone Golem in Relic Maze into destroying itself
Preemptive Strike I
Destroy both of the Mantalith’s arms before the fight begins
Preemptive Strike II
Destroy Prince Dail’s shield before he finishes his monologue
Secret Melody
Play the Secret Melody on a piano
Milla Unlocked!
Clear Relic Maze as any character
Sonic Lost World 100% Completion Guide (Wii U/PC)
So, you have Sonic Lost World? And you want to complete it all? Then this is the thing you’ve been looking for! Without further ado, let’s begin!
The Red Rings/how to get chaos emeralds:

Starting off on our completion journey we have a returning gameplay feature from Sonic Colors, the Red Rings. For those who don’t know, Red Rings are a type of collectable items you can obtain in this game’s main levels, there are five of these in each level (except some hidden/extra levels). Grabbing all of the Red Rings in a world nets you one of this game’s seven Chaos Emeralds. Collect all seven of the Chaos Emeralds and you unlock the form of Super Sonic an ultra-powerful version of Sonic that can’t be damaged, has enhanced speed and destroys enemies on-contact. This form needs a steady supply of rings to keep it sustained, when the rings run out the super form does as well.
This should be all you need to know about for now, so let’s go onto where these can be found.
Finding the Red Rings:
*”Number” refers to the number of the Red Ring*
| Windy Hill | Number |
|---|---|
| 1-1 | 1 |
| 1-1 | 2 |
| 1-1 | 3 |
| 1-1 | 4 |
| 1-1 | 5 |
| 1-2 | 6 |
| 1-2 | 7 |
| 1-2 | 8 |
| 1-2 | 9 |
| 1-2 | 10 |
| 1-3 | 11 |
| 1-3 | 12 |
| 1-3 | 13 |
| 1-3 | 14 |
| 1-3 | 15 |
| 1-4 | 16 |
| 1-4 | 17 |
| 1-4 | 18 |
| 1-4 | 19 |
| 1-4 | 20 |
| Desert Ruins | Number |
|---|---|
| 2-1 | 21 |
| 2-1 | 22 |
| 2-1 | 23 |
| 2-1 | 24 |
| 2-1 | 25 |
| 2-2 | 26 |
| 2-2 | 27 |
| 2-2 | 28 |
| 2-2 | 29 |
| 2-2 | 30 |
| 2-3 | 31 |
| 2-3 | 32 |
| 2-3 | 33 |
| 2-3 | 34 |
| 2-3 | 35 |
| 2-4 | 36 |
| 2-4 | 37 |
| 2-4 | 38 |
| 2-4 | 39 |
| 2-4 | 40 |
| Tropical Coast | Number |
|---|---|
| 3-1 | 41 |
| 3-1 | 42 |
| 3-1 | 43 |
| 3-1 | 44 |
| 3-1 | 45 |
| 3-2 | 46 |
| 3-2 | 47 |
| 3-2 | 48 |
| 3-2 | 49 |
| 3-2 | 50 |
| 3-3 | 51 |
| 3-3 | 52 |
| 3-3 | 53 |
| 3-3 | 54 |
| 3-3 | 55 |
| 3-4 | 56 |
| 3-4 | 57 |
| 3-4 | 58 |
| 3-4 | 59 |
| 3-4 | 60 |
| Frozen Factory | Number |
|---|---|
| 4-1 | 61 |
| 4-1 | 62 |
| 4-1 | 63 |
| 4-1 | 64 |
| 4-1 | 65 |
| 4-2 | 66 |
| 4-2 | 67 |
| 4-2 | 68 |
| 4-2 | 69 |
| 4-2 | 70 |
| 4-3 | 71 |
| 4-3 | 72 |
| 4-3 | 73 |
| 4-3 | 74 |
| 4-3 | 75 |
| 4-4 | 76 |
| 4-4 | 77 |
| 4-4 | 78 |
| 4-4 | 79 |
| 4-4 | 80 |
| Silent Forest | Number |
|---|---|
| 5-1 | 81 |
| 5-1 | 82 |
| 5-1 | 83 |
| 5-1 | 84 |
| 5-1 | 85 |
| 5-2 | 86 |
| 5-2 | 87 |
| 5-2 | 88 |
| 5-2 | 89 |
| 5-2 | 90 |
| 5-3 | 91 |
| 5-3 | 92 |
| 5-3 | 93 |
| 5-3 | 94 |
| 5-3 | 95 |
| 5-4 | 96 |
| 5-4 | 97 |
| 5-4 | 98 |
| 5-4 | 99 |
| 5-4 | 100 |
| Sky Road | Number |
|---|---|
| 6-1 | 101 |
| 6-1 | 102 |
| 6-1 | 103 |
| 6-1 | 104 |
| 6-1 | 105 |
| 6-2 | 106 |
| 6-2 | 107 |
| 6-2 | 108 |
| 6-2 | 109 |
| 6-2 | 110 |
| 6-3 | 111 |
| 6-3 | 112 |
| 6-3 | 113 |
| 6-3 | 114 |
| 6-3 | 115 |
| 6-4 | 116 |
| 6-4 | 117 |
| 6-4 | 118 |
| 6-4 | 119 |
| 6-4 | 120 |
| Lava Mountain | Number |
|---|---|
| 7-1 | 121 |
| 7-1 | 122 |
| 7-1 | 123 |
| 7-1 | 124 |
| 7-1 | 125 |
| 7-2 | 126 |
| 7-2 | 127 |
| 7-2 | 128 |
| 7-2 | 129 |
| 7-2 | 130 |
| 7-3 | 131 |
| 7-3 | 132 |
| 7-3 | 133 |
| 7-3 | 134 |
| 7-3 | 135 |
| 7-4 | 136 |
| 7-4 | 137 |
| 7-4 | 138 |
| 7-4 | 139 |
| 7-4 | 140 |

Locations:
1: At the beginning of the level, go forward until you reach a bridge, run up the tree after it and then that’s where the ring is.
2: Once you reach the third checkpoint, touch the first bell you see, follow it and continue touching it until it turns into a Red Ring.
3: After the last ring you’ll reach a large rotating wooden structure on the path, climb sideways on it until the ring is visible.
4: Once you get to the top of the previously mentioned wooden structure, jump over to the grassy area and then bounce on one of the multiple springs to reach a bunch of clouds, hop onto the second cloud of the smaller ones on the right to get your ring.
5: Shortly after leaving the waterfall section, get up on the platforms nearby the loop and jump through the ring stack close by to get the Red Ring.
6: One is near the windmill at the start of the level.
7: Get to the top of said windmill, stand on a nearby platform, wait until it takes you to the top, jump on the blocks to the right of you and you’ll find it.
8: When you get to the waterfall area of Windy Hill Zone 2, get the power-up nearby and use it to get to the loop close by, charge up a jump, release it and then there’s the ring.
9: After the loop from before, go to the right where the snail and two sheep at a higher ledge. Get up on top of where the sheep are and there it’ll be.
10: Once you leave the waterfall part of the level, get onto the leftmost platforms of the loop and jump over the nearby ring bunch.
11: At the beginning of this level, go through the tunnel and past the boulders, bounce on some nearby springs. When you’re in the next tunnel, break the blue tiles and then smash the crystals in the room you enter.
12: Go to the third path and to the platform that has spikes on it.
13: Head to the left pathway, use the speed booster and spring, then you will see a large crystal, destroy it to get the ring.
14: Soon once you’ve went by the 2nd checkpoint, follow the right path near to the beetles, then wall run back and forth until you reach a room with crystals, break the crystals.
15: In the last tunnel that contains boulders, follow and touch the bell nearby.
16: Soon after the thorns at beginning of the level, ignore the first set of six springs, look for and bounce on the set of three instead.
17: When at the waterfall that’s in the background, take the bottom path and go right.
18: At a similar looking waterfall, wait at a part with three platforms.
19: Use the Asteroid power-up and absorb the loop partway though the stage, clear out the area that appears inside of it.
20: A little bit later from getting the Asteroid power-up, go right to reach a windmill. Hop onto the windmill’s platforms, jump onto the highest one and continue to do this with all the windmills you see.
21: Stay at the right part of the starting area of the level, climb up a tall looking tree that you see.
22: When at the 1st 2D section of the stage, before it ends run up the wall at the end instead of exiting.
23: Once you’ve left the 2D part from before, in the open space there’ll be a platform with what you’re looking for on it, use the Crimson Eagle or climb onto the platform.
24: When you are at the 2nd Side-Scrolling part, jump onto and run on the wall on the left, touch the bell nearby and keep doing so.
25: Once you have passed by the Side-Scrolling section from not long ago, go over to the area where a lot of trees are at, climb up the first one.
26: In the free-fall start of the level, stay in middle the when near the end.
27: After the free-falling is over, pass through a tunnel until you reach a new path, keep focused on the left side of the path.
28: When at the wooden path with acorns nearby, homing-attack the acorns.
29: In the next tunnel, go to the right until you find a new wooden path, then jump over the gap on the left.
30: When you get to another of those 360 parts, travel round to the tunnel that’s below you.
31: When on the liquorice platforms, go to the area below onto the cookie and then go left.
32: Move over to the 2nd Oreo, stand on the right to make the left go upwards, then jump from there into a nearby cannon on a ledge.
33: Jump over the chocolate balls and the spring.
34: At the last cookie near some wasps, rotate the cookie.
35: Jump on the chocolate balls near the level’s end until you bounce high enough.
36: After a while of being chased by a tornado, hop to some nearby platform.
37: Use the Yellow Drill to drill through the ground and go to the top of the screen.
38: Once a 2nd tornado is coming after you, some platforms in your path will have what you are looking for.
39: Go through a loop and then leap across some animal cages.
40: Leap above the pit of quicksand after passing the second tornado.
41:Run into the 3rd water spout and climb a tree on the left.
42: Follow and touch a bell near another group of water spouts.
43: At the 2nd part of the level, go to the water spout on the left and start homing-attacking some wasps.
44: Free some butterflies, then take the third water spout to a ledge.
45: Bounce on some clouds at the ending of the act and open the capsule nearby.
46: Once you’ve used the orange juice pool, go to the left pathway.
47: In the top-right of the next area climb up some of the trees.
48: Climb up the totem poles next to the spinning blade in the ground.
49: Pass by some cannon robots and destroy the beetles.
50: Near the end point of the last area, ignore the juice pool and jump onto the platform on the left.
51: Once you reach an intersection, go upwards and keep going to the end of the path.
52: Through a water passage with sea snakes, on the 2nd rail.
53: From another intersection, go to the higher part and travel on it.
54: After the first sea snake is found, find a green rail and follow it.
55: Before the fan, on the left rail.
56: Once you have passed a bunch of globes, go to the small platforms and chase the bell.
57: When you are at five platforms, wait for the middle one to rise up.
58: Once you have gotten your way to platforms being raised by water, homing-attack a pink enemy to reach the top of a loop.
59: Between two trees with monkey throwing a ton of coconuts.
60: Close to a spiked ceiling in a corridor.
61: When at the start of the act, go backwards to reach a path and keep going that way. Double Jump above the cage.
62: A bell on top of some clouds.
63: Once at the third checkpoint, look for a similar alternate pathway to number 60 and leap onto the last piston on that path.
64: Go to a blue checkered wall and then run along a wall.
65: On the way to the exit of the level.
66: Knock all of the balls into the holes in the pool table.
67: Bounce over the gaping chasm in the ground.
68: Pass by the roosters and head to the right.
69: Knock the yeti off of the edge and leap over the gabs in the platforms.
70: There’s another pool table near the end of the stage, hit all of the balls into their holes.
71: On top of a stacked bunch of green tokens.
72: Once past the pinball part, head above a bumper.
73: Get up to the top of the 2nd pinball game.
74: Grab the bell on the purple carpet and follow it.
75: On top of the wall near to the number 1 panel.
76: Avoid the speed boosters on the floor and double jump over them.
77: At the end of a ring trail in an icy cavern.
78: Cross over the ceiling that has black water beneath it.
79: Go around the bolts and head for the middle opening.
80: Break some ice nearby 2 pistons.
81: Hop over to the rail on the right and use the speed boosters at bouncing mushrooms.
82: Go through the muddied water and bounce on a spring near some flowers and moles.
83: Go backwards from the flowers and stay away from the spike balls.
84: A bell on a group of rails.
85: The rail on the right, avoid the speed boost at the level’s ending.
86: Past the falling badniks and on the floating platform.
87: In an opening with a robot nearby.
88: Soon after the 2nd checkpoint in the stage.
89: Bounce on a mushroom to reach a higher platform.
90: After passing by an animal cage and going through a narrow passageway.
91: Keep on the higher icy pathway.
92: Run after a bell that is close to green goo and thin ice platforms.
93: Head south once back to the upper path, then smash purple tiles and a crystal.
94: Destroy more purple tiles and wait for an icicle to fall.
95: Make sure to break open the purple floor and
run across the walls.
96: Climb onto the first statue you see and wait for it to rise.
97: Go to the platforms on the left after seeing a spider.
98: Get yourself onto the statue near to the armoured pigs and wait.
99: Wall run after some spinning platforms have been passed by.
100: Double jump above the last statue and go through the secret area.
101: Nearby the windmill-esque building, go to the left of the grass and use the gigantic spring.
102: When in area with crumbling pathways, leap over the speed boosts and go to the edge from the right.
103: Once at the 3rd checkpoint, start wall-running till you find it.
104: Interact with a bell nearby and keep running after it.
105: In a cylindrical path, look for the brown coloured part.
106: In among a ring group.
107: Above a dragon robot.
108: Below when the dragon bot shoots lasers.
109: Above a gap with an animal cage.
110: Double jump to a platform below before the boss.
111: Just after you start the level.
112: In among a ring group.
113: Just before the half-way point.
114: In-between a bunch of missiles.
115: Soon after a massive rocket.
116: Go over to the middle of the screen and hang from the ledge there.
117: In the middle of a sand slope, near some badniks.
118: To the right of a cactus ball.
119: In the middle of some bouncing platforms bump into and chase the bell.
120: In an alcove after wall-running.
121-125: Wait for the meteors to impact the arena and then they’ll appear one by one.
126: Past the chicken robot that spits out eggs at you, go towards the 3rd spherical grind rail.
127: Once going into the water tunnel, stay on the rail to the right.
128: Jump over some mine carts, then jump from the top rail to the one smaller one at the bottom.
129: Stay on the small circular rail until it appears and then jump over to it.
130: Avoid the rails that aren’t green at the at of the stage.
131: Use the Hover wisp or wall-running to traverse over to the tall platform surrounded by lava.
132: When fighting Zor, ignore the curled pathway and head right instead.
133: After beating Zor, go through the outside area and wall run past the grates.
134: Use the Hover power-up and do what you did before with the grates on the next pair of them.
135: When at the cannon area, look on top of the cannons and when you find it, jump over to that part.
136-140: Keep your eyes focused on the road ahead while fighting the Final Boss, you may have to wait a while before these ones appear.
The Missions:
Now that we’re done with getting Super Sonic, we shall now move onto the Missions. Missions in this game are a set of tasks that once finished will give you a reward, usually a power-up of some kind. There are 100 of these tasks in total and each one of them will also give you an achievement in the PC/Steam version of the game.
Now, time to spin dash on over to these Missions and what they require!
Completing the Missions: (M=Mission)
M 1-13
Collecting Rings: 500,750,1000,1250,1500,1750,2000,2250,2500,3000,3500,4000,4500
Every time you grab a ring in a level progress goes towards these kinds of tasks, if you have them in your list when you grab said them. You’ll probably get most of these just by playing however if you want to intentionally farm them a good place to do so is in Sky Road’s Bonus stage, since it’s stocked to the brim with rings everywhere. Playing that Bonus stage enough times should be enough to complete all of these ring based missions after a while.
M 14-21
Finish zone with rings: 50,75,100,150,200,250,300,350
When it comes down to it, the “?” Zone of Sky Road should be the ideal place to achieve what’s needed here.
M 22-24
Jump: 30,100,250
You’re able to do this one just about anywhere in the game, make sure you finish the level so that your jumping progress doesn’t disappear.
Climb Ledges: 5
M 25
This one is completed by climbing five ledges, not much to say about this one except that you’ll probably end up doing it naturally.
M 26
Move on the ceiling: 5 seconds
In Desert Ruins Zone 1 there’s a part of the interior section that has a bug that can grab you and a wall that leads to some hangable vines. Run up the wall so that you then run across the ceiling.
M 27-29
Spin Dash: 2,5,10 seconds
Find a spherical planet and continually Spin Dash on it until you’re done. You can do this by pressing and holding the Spin Dash button down after pressing it already.
M 30-33
Wall Jump: 1,5,10,20
Reach a narrow upwards section in one of the 2D parts and you’ll be able to Wall Jump until you are done.
M 34-36
Run on the wall: 10,20,30 meters
Once you reach a 3D wall running section, jump onto the wall and keep running until the meter requirement has been accomplished.
M 37-39
Defeat badniks with Spin Dashing: 10,20,30
Go to Desert Ruins’ first act and there’ll be plenty of enemies to destroy with a continuous Spin Dash.
M 40-42
Eliminate badniks by bouncing on them: 10,20,30
Quite the irritating mission, as the lock-on system tends to complicate bouncing by tending to kick instead of bounce, this can be resolved by facing away from your targets before attempting to bounce.
M 43-45
Lock-on to and obliterate robots with a certain amount of lock-ons in a single homing-attack: 3,4,6
Find yourself a group of badniks and this should prove to be no issue at all to do.
M 46-48
Obliterate Robots in a certain way: kicks [1,100], Multi lock-on Homing attack
These may be gotten somewhat naturally as you pass through several parts of the Lost Hex.
M 49-54
Obliterate Robots: 50,75,100,200,250,300
Smashing up bee robos can finish this one up pretty quickly or you can just earn these as you play.
M 55-57
Acquire 1-Ups: 3,6,9
1-Ups can be easily found in Sky Road’s “?” zone and just before the end of Desert Ruins 2nd stage.
M 58-60
Cyan Laser: Eliminate 20 robots, gain rings [10,50]
Windy Hill act 1 has a Cyan Laser power-up at the first checkpoint post that is usable.
M 61-66
Yellow Drill: be the drill [30 secs], complete Drill Jumps [5,10,20], eliminate 10 badniks, acquire 50 rings
Be sure to keep grabbing the Drill power-up to continue drilling through the ground.
M 67-68
Orange Rocket: 10,50 rings
Tropical Coast’s 2nd and 4th acts are the only places in the whole game that have the Orange Rocket wisp, try to shoot straight up after obtaining the rocket to make things simple.
M 69-75
Indigo Asteroid: find a bonus room, be an asteroid [30 secs], destroy parts of the surrounding area [10,20,40], defeat 20 enemies, gain 100 rings
Windy Hill’s 2nd zone should have the satisfactory conditions to pull off these requirements.
M 76-77
Crimson Eagle: Fly for 30 seconds, Gain 50 Rings
Head over to the 1st act of Desert Ruins and there should be an ample amount of Eagle Wisps for usage. Make sure you keep picking up the Eagle capsules so that you don’t run out of energy.
M 78-79
Obtain rings with Rhythm Wisp: 100,200
Head to Silent Forest Act 2, find a Rhythm Wisp capsule and rapidly tap the jump button nearby any music notes.
M 80-83
Defeat enemies with Black Bomb: 1,3,5
To do these missions I recommend you hold onto all the Black Bomb Wisps that you can, since the only way of endlessly restocking them is to play through the Nights into Dreams stage. There’s a simple way to do this one, go to Frozen Factory’s 4th stage and use a Bomb Wisp on the ice blocks, they’ll count as enemies.
M 84
Don’t harm enemies:
This one just requires you to finish a zone without killing any enemies, you can do this in any zone but for the sake of convenience it’s best to do it in the first level.
M 85-87
Earn bonuses: 3,5,8
When landing onto the goal capsule at the end of a level you’ll get extra bonus depending on the vertical distance travelled before hitting the top of the capsule. Getting bonuses can be best done at the alternate exit of Dessert Ruins Level 3.
M 88-90
Do Zone with no deaths: 1,3,5
Any of the Zones can be used for this one and best ones to use would be the early levels like, Windy Hill Zone’s stages or even the first stage of Hidden World.
M 91-93
Complete Zone without any damage: 1,3,5
Most of what I’ve said above applies here aswell (See missions 88-90). Super Sonic can make this type of task a cinch to complete.
M 94-100
No-damage Boss Fights: Zazz,Zomom,Master Zik,Zeena,Zor,Zavok,Dr. Eggman
For this you must beat each boss in the game without taking a hit, you can easily achieve these with Super Sonic and you only have to avoid being hit while going up against the boss, not in the level before fighting it.
Conclusion:
Thank you to those who have read this far and if you liked this content, please share it or check out one of my other posts: What do stats/runes do in Rogue Legacy?
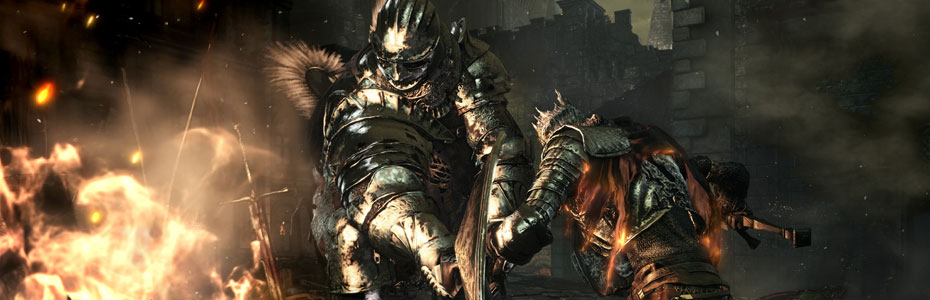
Dark Souls 100% Achievement Completion Guide
Dark Souls 100%
The beginning
So, you want to not only finish Dark Souls but you also want to 100% it too? Well, you’ve come to the right place.
Creating your character
We’ll begin this journey with our character creation. To stand the best chance of getting all the achievements you’ll want a character class and starting gift that works for you.
Let’s go over each of the gifts you can choose:
Gifts
Twin Humanities:

These can be used to return you to human form or kindle bonfires.
While this gift can be useful, it’s less good than it could be due to being able to get some of it very early on, there are much better gifts you could choose but it’s not the worst.
Tiny Being’s Ring:
Grants 5% maximum HP boost.
This one just plain sucks, a plus 5% to your HP does barely anything at low Max Health and once you can make use of it, there’s no point because the Ring of Favor and Protection outclasses it in just about every way.
Pendant:

This does nothing, no I’m not kidding this item is completely useless, don’t pick it.
Old Witch’s Ring:

Enables talking to Quelaag’s Sister.
If we base this item’s usefulness on it’s gameplay value, then it’s about as valuable as the Pendant. However if you like lore then it might just be worth getting, since you can’t get it again until late into the game.
Master Key:
Opens any basic lock.
This item for new players sadly isn’t actually that useful unless the player has prior knowledge of the game’s locations, you can buy it from Domhnall later on and the Thief class starts with this item by default. If they do know the locations well then the key is one of the better items you could choose.
Divine Blessing:

Fully restores HP and removes negative status effects.
While this is definitely a good item at first glace, you sadly only get 1 if you choose it as a starting gift or choose, because of it being such a good item it tends to be far too valuable to use. Even with it being rare you can still get it later on so I reckon you should stay away from this one.
Black Firebombs:

Explodes upon impact when thrown. More deadly than a standard firebomb. Player starts with 10 black firebombs if chosen.
These explosives are for sure worth it just because of the shear amount of damage they do when thrown, due to this they best used for boss fights. By choosing and using these you can kill the Asylum Demon the first time you meet it, rewarding you with the Demon’s Great Hammer.
Now that we’ve decided on our gift lets move on to the classes:
Classes
Warrior:
Starting Stats:
Vitality: 11 Attunement: 8 Endurance: 12 Strength: 13 Dexterity: 13
Resistance: 11 Intelligence: 9 Faith: 9 Soul Level: 4
Starting Equipment: Longsword, Heater Shield, Standard Helm, Hard Leather Armor, Hard Leather Gauntlets, Hard Leather Boots
The Warrior is a good choice if you want a balanced class to play as, thanks to it’s reliable equipment loadout and comfortable starting stats there no reason not to recommend this class to a new player.
Knight:
Starting Stats:
Vitality: 14 Attunement: 10 Endurance: 10 Strength: 11 Dexterity: 11
Resistance: 10 Intelligence: 9 Faith: 11 Soul Level: 5
Starting Equipment: Broadsword, Tower Kite Shield, Knight Helm, Knight Armor, Knight Gauntlets, Knight Leggings
If you’re a fan of bulky, tank-like, characters then the Knight is probably for you. The equipment works well towards the class’ strengths of high HP and protective armor. Although there is the issue of slow rolling due to the armor’s weight but if you can get past that, then you have a class you’ll most likely enjoy.
Wanderer:
Starting Stats:
Vitality: 10 Attunement: 11 Endurance: 10 Strength: 10 Dexterity: 14
Resistance: 12 Intelligence: 11 Faith: 8 Soul Level: 3
Starting Equipment: Scimitar, Leather Shield, Wanderer Hood, Wanderer Coat, Wanderer Manchette, Wanderer Boots
While this class’ stat line may look similar to the Thief’s, it has a somewhat different playstyle compared to how Thief tends to play. Due to it having a low Soul Level, therefore a bit more potential when it comes down to leveling up your attributes, having an interesting weapon and a useful armor set I’d say Wanderer isn’t a bad choice.
Thief:
Starting Stats:
Vitality: 9 Attunement: 11 Endurance: 9 Strength: 9 Dexterity: 15
Resistance: 10 Intelligence: 12 Faith: 11 Soul Level: 5
Starting Equipment: Bandit’s Knife, Target Shield, Thief Mask, Black Leather Armor, Black Leather Gloves, Black Leather Boots
Starting Items: Master Key
This is a class I personally like thanks to Master Key being a great starting item, the good stat line and the Target Shield being to parry with. While I don’t really care much for Bandit’s Knife as a starting weapon, I would not blame you for choosing this class.
Bandit:
Starting Stats:
Vitality: 12 Attunement: 8 Endurance: 14 Strength: 14 Dexterity: 9
Resistance: 11 Intelligence: 8 Faith: 10 Soul Level: 4
Starting Equipment: Battle Axe, Spider Shield, Brigand Hood, Brigand Armor, Brigand Gauntlet, Brigand Trousers
Bandit starts out with an awesome early-game strength based weapon, decent armor and nice attributes so I don’t see much reason to overlook it as a potential choice.
Hunter:
Stats:
Vit: 11 Att: 9 End: 11 Str: 12 Dex: 14 Res: 11 Int: 9 Fai: 9 Level: 4
Equipment: Shortsword, Short Bow, 30 Standard Arrows, Large Leather SHLD, Leather Armor, Leather Gloves, Leather Boots
I don’t really like Hunter that much, it just seems a little generic when overlooking all of your class options. 30 Arrows isn’t gonna last you long when you begin your adventure, this class in terms of stat line I feel is just a smidge too much like Thief and Wanderer.
Sorcerer:
Stats:
Vit: 8 Att: 15 End: 8 Str: 9 Dex: 11 Res: 8 Int: 15 Fai: 8 Level: 3
Equipment: Dagger, Small Leather SHLD, Sorcerer’s Catalyst, Sorcerer Hat, Sorcerer Cloak, Sorcerer Gauntlets, Sorcerer Boots
Starting Spells: Soul Arrow
I don’t really have any problems with this class, more or less because it starts out will useful equipment for early on and the starting attributes are a large boon the playstyle that the Sorcerer offers.
Pyromancer:
Stats:
Vit: 10 Att: 12 End: 11 Str: 12 Dex: 9 Res: 12 Int: 10 Fai: 8 Level: 1
Equipment: Hand Axe, Cracked Round SHLD, Pyromancy Flame, Tattered Cloth Hood, Tattered Cloth Robe, Tattered Cloth Manchette, Heavy Boots
Starting Spells: Fireball
Pyromancer is a very powerful class to begin your journey with, thanks to Pyromancey itself being quite a strong form of magic. It also has a lot of potential since it’s attributes are fairly well rounded and the low Soul Level allows for a lot of customization early on.
Cleric:
Stats:
Vit: 11 Att: 11 End: 9 Str: 12 Dex: 8 Res: 11 Int: 8 Fai: 14 Level: 2
Equipment: Mace, East-West SHLD, Canvas Talisman, Holy Robe, Traveling Gloves, Holy Trousers
Starting Spells: Heal
Estus Flasks, tending to be in short supply makes miracles rather useful within your adventure, as they give you move ways to heal you’re self. Granted, the cast time of Miracles is sometimes longer than you’d like, especially when in combat situations. The power of this class comes from the Mace you start with being a good bludgeoning weapon, beginning with a Talisman so you can try your hand at miracles and the armor is alright for what it is.
Deprived:
Stats:
Vit: 11 Att: 11 End: 11 Str: 11 Dex: 11 Res: 11 Int: 11 Fai: 11 Level: 6
Equipment: Club, Plank SHLD
Deprived as a class honestly isn’t that good, especially for a first time player because of the overly balanced stats and somewhat mediocre equipment you start with. However if you like challenge runs of games or just want a bigger challenge in general, this class is fine for that.
Achievement Hunting
Alright now for what you really came here for, the actual achievements! Lets begin with our first kind of achievement:
Unmissable
Enkindle:
Light bonfire flame.
Estus Flask:
Acquire Estus Flask.
The Estus Flask is given by Oscar of Astora in the Undead Asylum.
Reach Lordran:
Arrive in Lordran.
Ring the Bell (Undead Church):
Ring Bell of Awakening at Undead Church.
Ring the Bell (Quelaag’s Domain):
Ring Bell of Awakening in Quelaag’s domain.
Reach Anor Londo:
Arrive in Anor Londo.
Reaching Anor Londo requires that you get to the top of Sen’s Fortress, for the gargoyles to carry you there.
Lordvessel:
Acquire the Lordvessel.
You are given a Lordvessel after the Ornstein and Smough boss fight, by Gwynevere or if you kill Gwynevere.
Rite of Kindling:
Acquire the Rite of Kindling.
Art of Abysswalking:
Acquire the Art of Abysswalking.
More specifically you need to get the Covenant of Artorias from Great Grey Wolf Sif, who can be found in Darkroot Garden.
Defeat Seath the Scaleless:
Defeat Seath the Scaleless, inheritors of souls.
Defeat the Four Kings:
Defeat the Four Kings, inheritors of souls.
To actually fight the Four Kings you need to keep the Covenant of Artorias equipped for the whole fight, otherwise you will instantly die when you enter into the pitch black Abyss.
Defeat Gravelord Nito:
Defeat the Soul Lord Gravelord Nito.
Defeat Bed of Chaos:
Defeat the Soul Lord Bed of Chaos.
To Link the Fire and Dark Lord:
Reach “To Link the Fire” ending and Reach “The Dark Lord” ending.
I’ve grouped these two together because if you choose one of them you can’t get the other one until you finish the game again. So you technically can and can’t miss them both.
Upgrade Related
This set of achievements requires you level a weapon until you can’t increase it’s strength anymore. To do so means you’ll need several types of titanite shards, chunks and slabs, which you’ll then use to modify many different weapons to get each achievement. Certain blacksmiths will give certain kinds of reinforcement specific to them only. Below each achievement description I’ll list each blacksmith that does that kind of reinforcement.
Strongest Weapon
Acquire the best weapon through standard reinforcement.
- Andre of Astora
Crystal Weapon
Acquire the best weapon through crystal reinforcement.
- Giant Blacksmith
Lightning Weapon
Acquire the best weapon through lightning reinforcement.
- Giant Blacksmith
Raw Weapon
Acquire the best weapon through raw reinforcement.
- Andre of Astora
Magic Weapon
Acquire the best weapon through magic reinforcement.
- Rickert of Vinheim
Enchanted Weapon
Acquire the best weapon through enchanted reinforcement.
- Rickert of Vinheim
Divine Weapon
Acquire the best weapon through divine reinforcement.
- Andre of Astora
Occult Weapon
Acquire the best weapon through occult reinforcement.
- Andre of Astora
Fire Weapon
Acquire the best weapon through fire reinforcement.
- Vamos
Chaos Weapon
Acquire the best weapon through chaos reinforcement.
- Vamos
Covenant Related
The covenant achievements must be completed by finding each the leader of each one and asking them if you can join their’s. You don’t need to actually join the covenant, all you need to do is receive the option to join. I shall list the person you need to talk with underneath each achievement.
Covenant: Way of White
Discover Way of White covenant.
- Petrus of Thorolund or Rhea of Thorolund
Covenant: Princess’s Guard
Discover Princess’s Guard covenant.
- Gwynevere, Princess of Sunlight
Covenant: Blade of the Darkmoon
Discover Blade of the Darkmoon covenant.
- Dark Sun Gwyndolin
Covenant: Warrior of Sunlight
Discover Warrior of Sunlight covenant.
- Praying at the Altar of Sunlight
Covenant: Forest Hunter
Discover Forest Hunter covenant.
- Alvina
Covenant: Darkwraith
Discover Darkwraith covenant.
- Darkstalker Kaathe
Covenant: Path of the Dragon
Discover Path of the Dragon covenant.
- Praying to the Stone Dragon
Covenant: Gravelord Servant
Discover Gravelord Servant covenant.
- Interacting with Gravelord Nito’s sarcophagus
Covenant: Chaos Servant
Discover Chaos Servant covenant.
- Quelaag’s Sister
Collection Related
When it comes down to these ones, for you to be able to finish them you need to collect all of the kind of item that you need. There are quite a few of them so once more I’ll provide a list of each one you need.
Knight’s Honor:
Acquire all rare weapons.
Boss Soul
- Moonlight Butterfly Horn
- Crystal Ring Shield
- Quelaag’s Furysword
- Chaos Blade
- Greatsword of Artorias (Cursed)
- Greatsword of Artorias
- Greatshield of Artorias
- Golem Axe
- Dragon Bone Fist
- Lifehunt Scythe
- Dragonslayer Spear
- Smough’s Hammer
- Darkmoon Bow
- Tin Darkmoon Catalyst
- Great Lord Greatsword
Tail cutoff
- Drake Sword
- Dragon King Greataxe
- Priscilla’s Dagger
- Moonlight Greatsword
- Dragon Greatsword
- Gargoyle Tail Axe
Covenant
- Gravelord Sword
- Dark Hand
Enemy Drops
- Black Knight Sword
- Black Knight Greatsword
- Black Knight Greataxe
- Black Knight Halberd
- Black Knight Shield
- Channeler’s Trident
- Crescent Axe
- Crest Shield
- Demon’s Catalyst
- Giant’s Halberd
- Izalith Catalyst
- Silver Knight Straight Sword
- Sliver Knight Spear
- Silver Knight Shield
- Stone Greatsword
- Stone Greatshield
- Grant
- Sanctus
Corpse/Chest Loot
- Dragon Crest Shield
- Havel’s Greatshield
- Dragon Tooth
- Dragonslayer Greatbow
- Velka’s Rapier
- Astora’s Straight Sword
- Bloodshield
- Black Iron Greatshield
- Effigy Shield
Wisdom of a Sage:
Acquire all sorceries.
- Aural Decoy
- Cast Light
- Chameleon
- Crystal Magic Weapon
- Crystal Soul Spear
- Dark Bead
- Dark Fog
- Dark Orb
- Fall Control
- Great Heavy Soul Arrow
- Great Magic Weapon
- Great Soul Arrow
- Heavy Soul Arrow
- Hidden Body
- Hidden Weapon
- Homing Crystal Soulmass
- Homing Soulmass
- Hush
- Magic Shield
- Magic Weapon
- Pursuers
- Remedy
- Repair
- Resist Curse
- Soul Arrow
- Soul Spear
- Strong Magic Shield
- White Dragon Breath
Bond of a Pyromancer:
Acquire all pyromancies.
- Acid Surge
- Black Flame
- Chaos Fire Whip
- Chaos Storm
- Combustion
- Fire Orb
- Fire Surge
- Fire Tempest
- Fire Whip
- Fireball
- Firestorm
- Flash Sweat
- Great Chaos Fireball
- Great Combustion
- Great Fireball
- Iron Flesh
- Poison Mist
- Power Within
- Toxic Mist
- Undead Rapport
Prayer of Maiden:
Acquire all miracles.
- Bountiful Sunlight
- Darkmoon Blade
- Emit Force
- Force
- Gravelord Greatsword Dance
- Gravelord Sword Dance
- Great Heal Excerpt
- Great Heal
- Great Lightning Spear
- Great Magic Barrier
- Heal
- Homeward
- Karmic Justice
- Lightning Spear
- Magic Barrier
- Replenishment
- Seek Guidence
- Soothing Sunlight
- Sunlight Blade
- Sunlight Spear
- Tranquil Walk of Peace
- Vow of Silence
- Wrath of the Gods
Optional Boss Achievements
Defeat Dark Sun Gwyndolin:
Defeat Dark Sun Gwyndolin, the Darkmoon God.
Gwyndolin can be found in Anor Londo, past a statue that requires you to wear the Darkmoon Seance Ring in order to make the statue vanish.
Defeat Crossbreed Priscilla:
Defeat Crossbreed Priscilla, the Lifehunter.
Priscilla lives in the Painted World of Ariamis, which can only be accessed by obtaining the Peculiar Doll, found in a return visit to the Undead Asylum. You must then touch the giant painting in Anor Londo while holding the doll, afterwards you shall be transported the painted world.
The Dark Soul:
All trophies acquired.
This description above is inaccurate, you actually need every other achievement besides this one before you get it. If you have got this then congratulations, your journey is complete and I thank you for reading this guide.
If you liked this Dark Souls 100% guide, please share.
Visit Rogue Legacy stats/runes
Rayman 1 – Frequently asked questions
Questions
Q: How do I get to Candy Chateau?
A: Candy Chateau can only be unlocked by collecting all of the Electoons in the game (every single one of them).
Q: How can I get more continues?
A: You can’t get more continues unless you use a cheat code. When you are at the game screen and have three or less continues left, press up, down, right and then left. If done right this code will give you ten extra continues.
Q: What is the best level to find tings?
A: Anguish Lagoon is the best for tings due to it having lots of tings, being a short level, it is not too difficult to beat and has plenty of power-ups within it.
Q: How many ports does this game have?
A: The ports that have been made currrenly are: Atari Jaguar, Android, Game Boy Advance, Game Boy Color, iOS, MS-DOS, DSiWare, MS-DOS, Playstation, Sega Saturn.
Q: What is the best port of Rayman 1?
A: The best ports of Rayman 1 are usually widely agreed to be tied between the Sega Saturn version and the Playstation 1 version.
Q: What do all of the power-ups do?
A: Punch: This allows you to throw your fist at enemies and charge it to make it go further when punching.
Ledge Grab: This gives you the ability to grab onto the side of platforms.
Helicopter Hair: The Helicopter Hair power-up lets you hover in mid-air for a few seconds.
Sprinting: With this ability you can run instead of walking.
Purple Lum grabbing: Being able to use the Purple Lum Grabbing power-ups lets you use purple lums to swing back and forth on them in order to reach other platforms. (You need this power-up in order to progress past the Blue Mountains).
If you liked this Rayman 1 Q&A, please share.
Visit Rayman 2 Review
Spelunky – What are items used for?
Weapons
Crysknife
This is a melee weapon that kills anything it touches in one hit.
Mattock
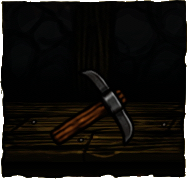
While not very powerful as a weapon it has it’s uses as a digging tool that can break one block near to the player several times before it breaks.
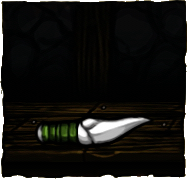
Boomerang
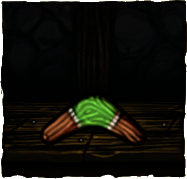
A ranged weapon that has decent range and comes back to the user unless it is blocked by terrain.
Camera

The camera flashes in front of the user when used. Anything caught in the flash is stunned except enemies like mummies, vampires and bats.
Shotgun
A powerful gun that shoots six bullets each time it fires. The shotgun also has a recoil that moves the uses back by a small amount.
Scepter
This can only be obtained by killing Anubis. Upon use it creates a magical projectile that homes in on living creatures that are nearby including the player. It causes 11 points of damage. If held after obtaining the Hedjet you can access the City of Gold in level 4-2 of the temple.
Freeze Ray
A short ranged weapon that turns enemies into ice blocks that can be stomped on to instantly kill that enemy.
Web Gun
The Web gun does no damage to enemies however what it does do is slow down anything that is caught in the webs it creates when fired. A player can jump while in a cobweb to gain some height.
Plasma Cannon

A ranged weapon that shoots explosive energy shots. It takes a decent amount of time before you can shoot another energy shot. The Plasma Cannon also has a large amount of recoil when fired.
Shield
A frontal shield that protects the player from projectiles like bullets. It can also crush anything that the player moves the shield into as long as there is a wall to crush the enemy against.
How do Kali altars work in Spelunky?
Kali altars are altars which are covered in blood. These can be found in almost any level except for Olmec’s lair, King Yama’s lair and bonus levels that are not the Haunted castle. If an altar is destroyed the player will lose favor with Kali. If enough of this favor is lost then Kali will inflict punishments such as summoning spiders, a ball and chain or a ghost that can instantly kill you.
You can also place knocked out or dead creatures on the altar to sacrifice them to Kali. If you sacrifice enough creatures Kali can reward the player with items like a cape, jet pack, compass, spectacles, spiked shoes, climbing gloves, bomb paste, spring shoes, a bomb box and a pitchers mitt. It is also possible to be given the Kapala an item that collects blood from enemies to restore your character’s health. Another possible reward from the altar is invigoration which gives 8 health to the player character.
Creatures that can be used for a sacrifice include mantraps, shopkeepers, black knights, yetis, hawk men, scorpion, devils, spelunkers, damsels, hired hands, scorpion flies, tiki men, Vlad, cavemen and vampires. Different creatures are worth different amounts when they are put on the altar.
Damsels, hired hands, spelunkers and the black knight are worth 8 points when alive and 4 points as corpses. Shopkeepers, hawk men and scorpion flies all are worth 6 while living, hawk men and shopkeepers give you 3 when dead (scorpion flies don’t have corpses to use). Scorpions and yetis obtain you 4 points when in a living state, yetis also give 2 favor when dead (scorpions don’t leave a dead body). Devils, tiki men, cavemen, vlad, vampires and mantraps give 2 points when alive, devils, tiki men and cavemen give the player 1 point when they are dead (vampires, mantraps and vlad don’t have corpses upon death).
How to get all the achievements in 7 Days to Die

Crafting Achievements
Alexander Bell
Craft 50 items
Benjamin Franklin
Craft 500 items
Henry Ford
Craft 1500 items
Thomas Edison
Craft 5000 items
Zombie Killing Achievements
The Grave Digger
Kill 10 zombies
The Embalmer
Kill 100 zombies
The Mortician
Kill 500 zombies
The Funeral Director
Kill 2500 zombies
Player Killing Achievements
Napoleon
Kill 10 players
Julius Caesar
Kill 100 players
Genghis Khan
Kill 500 players
Alexander the Great
Kill 2500 players
Traveling Achievements
Christopher Columbia
Travel 10 kilometers
Ferdinand Magellan
Travel 50 kilometers
Marco Polo
Travel 250 kilometers
Neil Armstrong
Travel 1000 kilometers
Death Achievements
Bite the Dust
Die 5 times
Knock em Dead
Die 25 times
Your Number’s Up
Die 100 times
Meet Your Maker
Die 500 times
Wellness Achievements
Alive and Kicking
Reached 125 in wellness
Fit as a Fiddle
Reached 150 in wellness
Healthy as Horse
Reached 175 in wellness
The Picture of Good Health
Reached 200 in wellness
Scoring Achievements
Scavenger
Scored 10 in a Single Game
Adventurer
Scored 50 in a Single Game
Nomad
Scored 250 in a Single Game
Warrior
Scored 500 in a Single Game
Survivalist
Scored 1000 in a Single Game
Player Survival Achievements
Brush with Death
50 Minutes Lived in a Single Player Game
Near Death Experience
150 Minutes Lived in a Single Player Game
Cheated Death
500 Minutes Lived in a Single Player Game
Nearly Immortal
1250 Minutes Lived in a Single Player Game
What do stats/runes do in Rogue Legacy?

Stats
Health
The Health stat allows you to take multiple hits before dying and can be upgraded in the mansion by spending gold. This stat can also be modified by playing as different classes.
Mana
This stat allows you to use spells more often and can be upgraded in the mansion by spending gold. This stat can also be modified by playing as different classes.
Armor
This stat reduces damage to your player character and can typically be added via wearing more powerful armor pieces.
Strength
Strength increases the amount of damage you can do to enemies. You can increase this stat by using better swords or choosing certain classes.
Intelligence
Intelligence increases the power of attacks that use mana. Classes like archmages tends to have a higher intelligence than other classes.
Runes
Vampirism
While playing Rogue Legacy you may see a stat on some armor sets or on runes for your armor named vampirism. You may wonder what it does when you see it. Well if your character has this stat on them via whatever means they gain the ability to heal small portions of their hp when they defeat enemies. This ability will also become stronger if you have a higher vampirism stat.
Sprint
While playing you might see a stat on some armor sets or on runes for your armor named sprint. You may wonder what it does when you see it. Well if your character has this stat on them via whatever means they gain the ability to dash short distances in the air or on the ground. This ability will also become better by allowing you to dash in the air multiple times by having a high stat amount.
Bounty
While playing you might see a stat on some armour sets or on runes for your armour named bounty. You may wonder what it does when you see it. Well if your character has this stat on them via whatever means they gain more gold than they would usually. This ability will also become better by increasing the amount of gold further by having a higher stat amount.
Siphon
While playing Rogue Legacy you may see a stat on some armour sets or on runes for your armour named siphon. You may wonder what it does when you see it. Well if your character has this stat on them via whatever means they gain the ability to regain small portions of their mp when they defeat enemies. This ability will also become stronger if you have a higher siphon stat.
Vault
While playing you might see a stat on some armour sets or on runes for your armour named vault. You may wonder what it does when you see it. Well if your character has this stat on them via whatever means they gain the ability to jump multiple times in the air. This ability will also become better by allowing you to jump in the air multiple times by having a higher stat amount equipped to your character.
Balance
This rune has the abilities of both the Siphon and Vampirism runes combined however it’s recovering abilities are not as powerful as Vampirism or Siphon. Each time you go into a new game plus the power of balance increases.
Air
A rune of this type gives you the ability to float in the air for a short amount of time which can be increased by using more runes of the same type.
Haste
This type of rune increases how fast your character can move and can be increased further by adding more of this type of rune.
Curse
Using this rune makes enemies you encounter harder to defeat however if you do defeat them you gain more gold than usual. You can also increase the gold earned by using more of this rune.
Grace
This rune makes enemies you find easier to defeat however as a result you earn less gold. This rune effect increases the more of them you use.
Retaliation
The ability of this rune allows you to take half of any damage you receive and make the enemy take the damage as well.
Shrine Items
Hermes’ Boots
These boots prevent you from taking damage due to floor spikes but not from trap spikes, spikes on the walls or on the ceiling.
Charon’s Obol
This item allows you to enter the castle with giving up any gold you currently carry however after using it once you lose the obol until you find it again.
Hedgehog’s Curse
The Hedgehog’s Curse item cause you to drop gold onto the ground every time you take damage.
Calypso’s Compass
This compass shows you an arrow when using it. This arrow leads you a room that contains many treasure chests with valuable blueprints or stat ups contained with in them. The Calypso’s Compass room disappears when you leave it.
Nerdy Glasses
These glasses fix the Color Blindness, Stereo Blindness, Nearsighted, Farsighted, Nostalgic, and Vertigo traits if your character has them on the run they are on. You can’t find this item at a Spiritual Shrine unless your character already has one of the traits that the item fixes.
Helios’ Blessing
This item increases the amount of loot you can obtain via killing enemies and makes enemies who would not drop any loot drop a minimum amount of gold.
Hyperion’s Ring
This Ring allows you to come back to life after dying however you return with a third of your health and the ring breaks after you use it.
Khidr’s Obol
This obal gets automatically given to Charon before going back into the castle. Once given to Charon you will then be able to fight the Remixed version of Khidr.
Alexander’s Obol
This gets automatically given to Charon before going back to the castle. Once given to Charon you will then be able to fight the Remixed version of Alexander.
Ponce de Leon’s Obol
This item gets automatically given to Charon before going back to the castle. When given to Charon you will then be able to fight the Remixed version of Alexander.
Herodotus’s Obol
Herodotus’s Obol gets automatically given to Charon before going back to the castle. When given to Charon you will then be able to fight the Remixed version of Herodotus.
Traitor’s Obol
The Traitor’s Obol gets automatically given to Charon before going back towards the castle. When given to Charon you will then be able to fight the Remixed version of Johannes.
If you liked this Rogue Legacy stats/runes post, please share.
Visit Rogue Legacy Review
Super Meat Boy – What is the hardest level?
When it comes to how difficult a level is in super meat boy there are usually several aspects to determine how tough a level is. Some of the aspects include is how long the level is, the level having lots of obstacles, if the level has a light world or dark world counterpart or how fast paced the level is. Some of the hardest levels in the game have a focus on one or a combination of these aspects. For example The Kid from I wanna be the Guy warp zone is a hard level because of how long it goes on for and having to go back the start of the level if you decide to exit it. The Cotton Alley levels tend be difficult by filling the levels full of various obstacles like buzz saws, spikes on the walls, disappearing and reappearing blocks. Having to collect any bandages can make any level more challenging however once they are collected the difficulty can go down somewhat. Difficulty of a level can also be affected by playing as characters that are not Meat Boy.
Hard levels
7-20, 7-20 X, 6-5 Omega, 7-19X XOXO, 5-17X Millenium, 5-18X Stain, 5-20X Quietus, 7-18X They Bite, 4-16X Starless